How to Sharpen a Double-Edged Sword or Dagger? [Step-By-Step Guide]
![How to Sharpen a Double-Edged Sword or Dagger? [Step-By-Step Guide]](https://www.outfit4events.cz/images/palette/shared/www/multimedia/brouseni-mece-01.1443294657.1721821456.jpeg.webp)
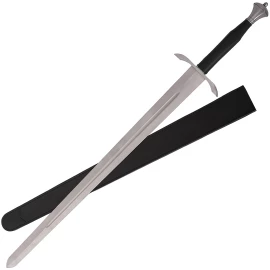
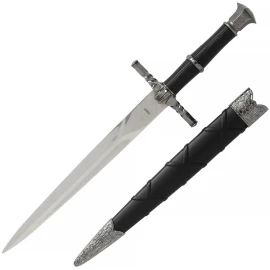
Unlike Japanese blades, European (double-edged) swords and daggers need to be sharpened from both sides. With a proper guide, however, the process does not take longer than a few minutes, and you can avoid injuring your fingers or damaging the edge of the blade. In our walkthrough, we will show you the right sharpening technique.
Contents
European vs Japanese Sharpness
European and Japanese swords (and daggers) were different in a few key aspects. They used different techniques of steel hardening and production, and the blades were used differently as well.
Japanese swords had a curved blade, usually with only one sharp edge. They were made of several layers of steel. The blades with this construction were suitable for fast and precise cuts.
On battlefields, weapons with this construction were extremely important. This is because the outcome of a battle was often decided by a single lethal strike against an opponent who usually used only leather armour or other types of light armour.
European swords had mostly straight, double-edged blades, sharp on both sides, which made them effective cutting and stabbing tools. They were usually made from a single piece of steel.
Unlike in Japan, European warriors used various types of plate armour and chainmail armour. The blacksmiths often had to adapt their weapon-making process to make sword blades effective against the newly emerging forms of armour. For example, stilettos were daggers with a thin, narrow blade that would penetrate plate armours.
Because the weapons on both continents were different, the blade sharpening methods were different too. In this article, we will look at the sharpening process of double-edged swords and daggers.
DID YOU KNOW... knights were among the most respected warriors in medieval times, inspiring both awe and fear well beyond the European borders? Have a look at the most famous knights from European history.
Safety first!
When sharpening a blade for the first time, you have to be extra careful. Take your time. It is easy to injure yourself when in a hurry!
Preventing injuries is better than treating them:
- Always wear protective gloves when sharpening blades. This size chart will help you choose the right size of gloves.
- First of all, you will need to have enough time for sharpening your sword. Plan the sharpening for the time when you are not likely to get disturbed or interrupted.
- After the sharpening is done, store the weapon in a safe place - out of reach of children or pets, ideally in a protective sheath.
![How to Sharpen a Double-Edged Sword or Dagger? [Step-By-Step Guide]](https://www.outfit4events.cz/images/palette/shared/www/multimedia/brouseni-mece-02.3068510588.1721821456.jpeg.webp)
Sharpening a Double-Edged Sword in Three Steps
The sharpening process can be divided into three main stages. We describe them below:
1. Getting Ready
Before you start, prepare your tools and everything else you need for sharpening.
- Protective gloves
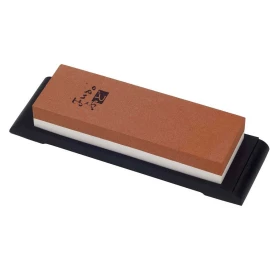
- 2 whetstones: a 200/1000 grit whetstone and a 1000/3000 grit whetstone
- A square bucket or other larger container for water
- A fine polishing cloth to clean the blade
- A pallet and two carpenter's clamps to hold the sword (optional)
Protective gloves - to protect your fingers and hands from injuries and dryness (when using sharpening stones).
Whetstones (sharpening stones) - the most essential tools you will need to sharpen your blades. Whetstones come in various materials (natural, synthetic), shapes, and grit.
A square bucket filled with water - you need to dip the sharpening stone in water. When the whetstone absorbs the moisture, it will make your job much easier.
A fine polishing cloth - for finishing the sharpening process. With the cloth, you will remove any dirt and residue that might be left on the blade after sharpening.

2. Sharpening
Step 1 - Prepare your whetstone: submerge the whetstone in water for approximately 15 minutes so it absorbs enough moisture. For some types of whetstones, it may be recommended to use oil. In these cases, follow the instructions on the product packaging.
Step 2 - Secure the sword or dagger in place: make sure the blade is placed on a flat, non-slippery surface. If you are more experienced in sharpening blades, a larger table will suffice. If you are sharpening the blade outdoors, you can place it on a pallet and secure the sword at the edges with clamps (e.g. woodworking clamps).
Step 3 - Sharpening angle: if you are sharpening a sword or dagger while they are lying loose, keep the blade at an angle of approximately 20 degrees to the whetstone.
Step 4 - Sharpen the blade: Move the whetstone over the blade at a consistent angle, from the guard to the tip. If you are sharpening the blade for the first time, concentrate on consistent strokes. Apply even pressure to all parts of the blade. If the blade is longer, sharpen the first half with even strokes, and then the second half.
Step 5 - Check the sharpness as you go: after a few strokes with the whetstone, check the sharpness of the blade. Continue the sharpening process until you achieve the desired level of sharpness. Then flip the sword over and repeat the same steps on the other side of the blade.
Step 6 - Wipe down the blade: Once you have finished sharpening, wipe the blade clean of any residue. Check that the blade is sharpened evenly along its entire length.
You can also test the sharpness of the blade by cutting a piece of paper. Did the blade go through smoothly? If you are satisfied with the sharpness and find no defects on the surface of the blade, the sharpening process is finished.
If you prefer a demonstration, watch the following video:
3. Practical Tips
- Choose the right whetstone: for the perfect result, you need two whetstones, a coarse stone for the major sharpening job, and a finer-grit stone for blending and fine-tuning of the blade.
- Sharpen your blade regularly. Do not wait until the blade is completely dull. The longer the interval between sharpening and maintenance jobs, the harder your job will be.
- Use the correct sharpening technique: apply even pressure in all parts of the blade. You will get the hang of the sharpening strokes faster and achieve even sharpness along the full length of the edge.
DID YOU KNOW... You can use whetstones for sharpening your kitchen knives, too? Learn how to sharpen a knife correctly. Sharp knives will make cooking easier, without having to struggle when cutting through hard vegetables or meat.
A Perfectly Sharpened Blade is Both Useful and Beautiful
If you follow the instructions above, you will prevent damage to your sword and extend the durability of the blade. Regular maintenance will keep your weapon in perfect condition, so you can use it to practice your historical fencing or display it on your wall.
While you may not seek glory on the battlefield, a dagger or sword will become an excellent decoration of your home.
But do not forget that a sharpened dagger or sword is, after all, a deadly weapon. They were designed to kill!
You should always handle the weapons with care and make sure nobody “unauthorized” has access to them.

Comments